Monday, October 28, 2013

Mini Vanilla Cupcakes with Bright Blue Buttercream!


I made these cute little guys for a coworker that is getting married in 2 weeks! He hadn’t eaten any lunch yet, so was very grateful for the sweet surprise! I didn’t know exactly what kind of cupcakes he liked, so I went with plain vanilla cake with buttercream frosting. I got the mini vanilla cupcake recipe from food.com. The below recipe makes 20-25 mini cupcakes (I didn’t need that many) so I halved this recipe:


• 2 cups flour
• 1/2 teaspoon salt
• 2 teaspoons baking powder
• 1/2 cup butter, softened
• 3/4 cup sugar (if you like your cupcakes very sweet, add a little more.)
• 2 eggs
• 1 cup milk
• 1 teaspoon vanilla essence (optional)


Directions:
1. preheat oven to 375 degrees, line muffin cups with papers.
2. cream butter and sugar till light and fluffy. beat in eggs one at a time.
3. add flour (mixed with baking powder and salt) alternating with milk beat well; stir in vanilla.
4. divide evenly among pans and bake for 18 minutes. let cool in pans


For the Buttercream Frosting, I used the recipe on the side of the Confectioner’s Sugar box:
1 box (3 ¾ cups) Domino Confectioner’s Sugar
1 stick of butter (1/2 cup)
3 to 4 tablespoons of milk
1 teaspoon vanilla extract

Again, I didn’t need that much frosting so I halved the above recipe too. I spruced up the buttercream by using my Wilton Food Gel in blue. Since I halved the batch, I put a bit too much food gel! I was going for more of a sky/pale blue but instead got this bright blue color. They are still pretty cool! I finished the cupcakes off with some candy hearts and chocolate pearls from Michael’s. You guys like them? =)

Bacon Cheddar Pull-Apart Bread! And yes, it IS as amazing as it sounds!

Bacon lovers – this recipe is mind blowing and so easy to make! Greg’s wonderful cousin posted this recipe on facebook, and just by looking at the photo it seemed like something we would be interested in. C’mon…bacon, cheese and bread. I can’t think of a more awesome, unhealthy snack/appetizer for football Sunday. Or any lazy day. See the recipe below and a photo of the bacon bread we made yesterday!


BACON CHEDDAR PULL-APART BREAD

8 oz of your favorite shredded cheddar cheese blend
8oz diced sliced bacon, cooked crisp
1 large round loaf of soft bread (like a french or Italian round)
½ cup melted butter
1 tablespoon dry ranch dressing mix from packet

Cut bread into ¾ inch intervals, being careful not to cut all the way through.
Cut again, crosswise, not cutting all the way through.
Place cheese between all cuts, then sprinkle with bacon (!!!)
Blend melted butter and ranch mix and drizzle overtop of bread evenly.
Wrap in foil and bake at 350 degrees for 15min, uncover then bake for another 10min.
Serve hot and pull apart pieces from loaf to eat.

How awesome does this look!? We made this as an appetizer for football, but miiiight have eaten a little too much. We were full for a while! Hope you guys enjoyed! <3>

Monday, October 21, 2013

Bloody Vodka Shirley Temple

Hi Halloween lovers! We made this scary cocktail to keep us company while pumpkin carving! Super easy and not a lot of ingredients!

Equal parts vodka and Sprite or 7-UP (less vodka if you don’t want it as strong)
Grenadine in a test tube
Martini glass
Shaker

Combine soda and vodka together in shaker with ice. Shake lightly. Pour into martini glass. Pour in Grenadine as desired.


And you’re done! I saw this recipe on Pinterest, but instead of a test tube they used a syringe. Pretty cute stuff! The Grenadine will settle to the bottom, giving the drink a cool two phased effect. You can leave it like that, or mix it together. I found the test tubes on sale at Michael’s craft store for cheap, great find. Hope you guys enjoy!

My Experience at the Institute of Culinary Education - Pasta Making Class 101!


Hey guys!

My husband and I did a really cool thing together – we took a pasta making class at ICE (Institute of Culinary Education). ICE – for those of you who don’t know – is a very well respected culinary school in NYC that also offers recreational cooking classes. We love to cook new things and challenge ourselves, and thought it would be really awesome to make our own pasta! ICE offers a WIDE variety of recreational classes – everything from cooking steak, to pizza, cooking classes for kids, baking classes, vegan classes and so on.

I didn’t really know what to expect when I signed up, I’ll admit I was a little nervous! I felt like it was the first day of school all over again ha. I never took a cooking class before and I honestly didn’t want to suck. The class was on a Saturday night and ran from 6:00-10:30pm. It seems like a long time, but we had such a blast that we didn’t notice the time flying by! Here’s how it went. We started off the class by making our own pasta dough. Our whole class stood around one table and did it together. Very simple recipe – 3 large eggs, 2 ¼ cup flour and a pinch of salt. Sounds easy, right? You really get an appreciation for those little old Italian ladies who make dough by hand – it is TAXING. You need to knead the dough until it’s all uniform and springs back when touched. They say 7-10minutes but since we are amateurs, it took a little while longer. Let’s just say I felt like I had big muscles when we were done. After our dough was done, we wrapped it in plastic wrap and let it sit for 30min.

Now the fun part came. Our class was divided into 3 smaller teams. Each team was responsible for creating their own pasta and sauces. Our class made everything – ravioli, spaghetti, cannelloni, fettucini, etc and the accompanying sauces. Our team worked together to collect all the ingredients needed for our dishes. It was kinda tough being in someone else’s kitchen and not knowing where things were! Our instructor was great – she demonstrated how to make the pasta using the Kitchen Aid mixer. She was always around when you needed help, however the class was more of a figure it out on your own type class which was great for learning. We got the packet of recipes in the beginning of class, and worked together with our team to create the dishes.


Greg at our cooking station!


The kitchen was a bevy of activity – people grabbing ingredients, water boiling, food processors buzzing, people running to and from the stove to check on their creations. Our team got to make ravioli, which I’ve always wanted to do! We rolled out our dough using the Kitchen Aid mixer until it was paper thin. Then we made the ricotta filling and cut the ravioli by hand. We split them into a few batches, and popped them in the boiling water. When they rose to the top, they were done and ready to be platted. It was amazing! Greg and I are usually not big pesto sauce fans, however the pesto we made for the ravioli was very good. We also made spaghetti with cacio e pepe (a wonderfully tasty and easy to make sauce!) It’s essentially cracked pepper, percorino, romano and some pasta water. This sauce is so quick and easy to make – will definitely make it again when we are having company! Think adult mac and cheese. Yeah, you need it.

Our pesto sauce in the food processor

Us having a blast!


Our finished ravioli with pesto!

Another team's beautiful spaghetti dish!
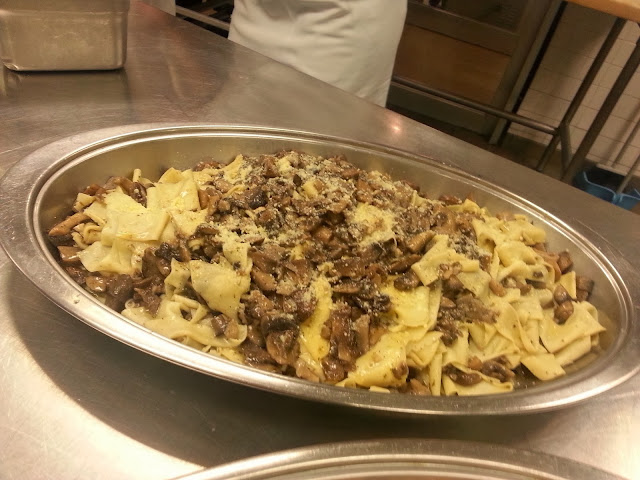
Mushroom

Our awesome cacio e pepe!


My overall experience was really positive and rewarding. My favorite part was when all teams lined up their dishes on one table buffet style, and you got to try what everyone made! After all the hard work (I was definitely sore the next day!) it was nice to sit down with our class, have some wine and of course, dig in. It was beyond rewarding eating pasta you made from scratch. The taste is unparalleled. We plan on going back to ICE and taking another class. I wish we could do it more often, but at $100+ per person we will make it a special occasion activity! Thanks for reading guys.

We got to taste all this goodness!

Where we all ate together

Buon appetito!

Jungle Themed Cake and Decor for Baby Shower

Hi All!
Wanted to share some photos from a lovely baby shower in honor of my husband’s cousin! Well, now she is my cousin too =) Her sister threw her an amazing jungle themed baby shower, it could not have been any cuter! A jungle themed cake, cupcakes, cocktails, even centerpieces and favors! See below and enjoy.


How cool is this cake?! The fondant work on this thing alone is pretty impressive
The two layers were different flavors - one chocolate with vanilla icing, one vanilla cake with chocolate pudding filling!


You can't go wrong with a champagne cocktail with a little monkey friend!!


Monkey cupcakes!


Absolutely gorgeous day outside and beautiful venue for the party!

 
My piece of the awesome jungle cake and a red velvet cupcake!


Sunday, October 13, 2013

Soft Gingerbread Spice Cookies

Hi friends! It's been a while since I've had the opportunity to bake - I just got married last month! Our wedding was wonderful! Today, I decided to finally get back on the baking horse with these amazing cookies. I got the recipe from dinnervine.com. They are the perfect fall cookie in my opinion! The ginger and clove make these very festive. They are pretty easy to make too. The cookies are so soft on the inside, but have a nice crispy outside. This recipe makes about 3 dozen cookies. Today was also the first time I got to use my awesome Kitchen Aid mixer! See below for recipe and enjoy!


2 1/4 cup flour
2 tsp ground ginger
1 tsp baking soda
3/4 tsp cinnamon
1/2 tsp ground cloves
1/4 tsp salt 3/4 cup butter, softened (1.5 sticks)
1 cup baker's sugar
1 egg
1 T water
1/4 cup molasses
1/4 cup white sugar (for rolling dough before baking)
Powdered sugar, for dusting tops of baked cookies
Parchment paper, for lining baking pan

  1. Preheat oven to 350.
  2. Prepare large baking sheet with piece of parchment paper to fit.
  3. In mixing bowl sift dry ingredients: flour, ginger, soda, cinnamon, cloves & salt.
  4. Whisk dry ingreds well.
  5. In bowl of electric mixer, cream butter & sugar.
  6. Beat in egg, then add water and molasses, combine till smooth.
  7. Gradually add dry flour mix into the wet mixture.
  8. Transfer dough into smaller metal bowl and place in freezer for about 25-35 minutes (*Consistency of dough is soft set, so chilling dough allows us to make perfect rounds for baking).
  9. Remove firmed dough from freezer and roll into about 1T size dough balls, in palms of hands.
  10. Roll to coat each dough ball on a shallow dish with remaining sugar.
  11. Place sugar covered dough balls on parchment-lined baking sheet.
  12. Bake 8-10 min, till browned.
  13. *Cookies will have slight crust on outside, but be soft inside!
  14. Immediately cool cookies on wire baking rack.
  15. Once cooled, dust tops of cookies with powdered sugar.
  16. Store left over cookies in air-tight container, but also stores well in fridge and freezer.
Here they are! So soft inside, crispy on the outside

I don't know how I lived before I had this. I used to use a hand mixer for all baking.
Thank you to whoever invented this amazing machine.